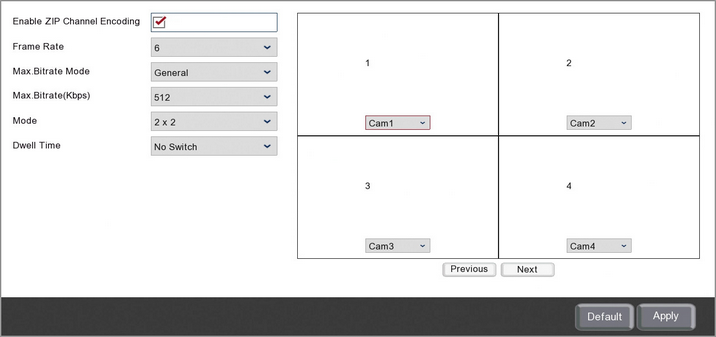
The Zip Channel sub-menu enables you to configure a single stream which contains multiple camera images to overcome performance issues when viewing remotely on slow internet connections. Rather than trying to stream multiple channels individually you can create a split screen view of up to 16 cameras and stream it as 1 channel. This is a great tool where poor internet speeds usually prevent you from viewing multiple cameras at the same time.

Enabling Zip Channel
You can enable or disable the Zip Channel feature by ticking or unticking the Enable ZIP Channel Encoding check box.
Once enabled you will be able to select Zip Channel from the recorder's channel list when using the Zip Vision PC client software.
Frame Rate
You can set the frame rate for the zip channel from the Frame Rate drop down list. You can choose from 1 to 6 frames per second to get the best results for the internet speed available.
Max.Bitrate Mode
To make setting up the Zip Channel easier the bitrate mode is set to General.
Max.Bitrate(Kbps)
You can choose the max bitrate for the Zip Channel by selecting one of the commonly used pre-set bitrates from the Max.Bitrate(Kbps) drop down list
Just remember that the bitrate is the amount of data transferred per second so a high bitrate will produce a high quality image but requires a faster internet speed. A low bitrate will produce a low quality image better for slower internet speeds.
Setting Up The Split Screen Display
You can set the layout of the Zip Channels split screen display from the Mode drop down list. You can choose from a 1x1 up to a 4x4 grid.
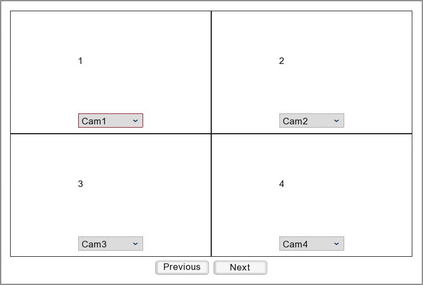
Once you have chosen layout of the grid you can set which cameras appear where using the camera drop down lists in the grid preview. Just note that each camera can only appear once.

You can switch to the next or previous set of cameras by clicking the Previous or Next buttons.
Dwell Time
The Dwell Time allows you to define how long the first set of cameras will be displayed, as shown in the grid preview, before switching to the next set of cameras. You can choose from 5 seconds up to 300 seconds. After the last set of cameras has been displayed it will loop back to the first set of cameras and the cycle will start again.
You can turn off automatic switching by setting the Dwell Time to No Switch. This will stop Zip Channel from cycling through each camera set and will only switch when you click Previous or Next.
Defaulting Settings
To restore settings back to the factory default you can click the Default button.
Saving Changes
When you are happy with the current settings click the Apply button. If you exit the window without saving any changes will be lost.