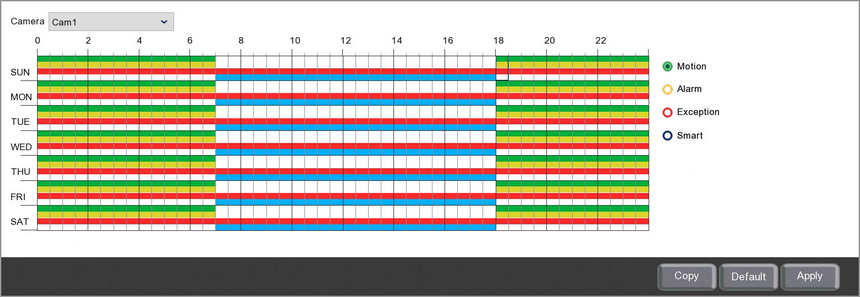
From the Email Schedule sub-menu you can create a unique timetable to tell the recorder when to send email notifications. You can also choose which event type notifications are included. This could be when motion is detected, when an alarm is triggered, when there is an exception error on the recorder or when there is a smart detection trigger.
For an event to be included in email notifications they will need to have Send Email ticked in the Alarm Menu and be active in the email schedule.
As an example you could create a schedule which notifies of recorder exception errors at any time and just smart detection triggers during busy business hours. It could then switch to motion detection or alarm triggers at night when nobody is around. This would prevent the recorder from sending a large number of emails during the day when there are lots of people around and alert you to any activity at night when the premises should be empty.

Camera
Select the camera you want to create the email schedule for form the Camera drop down list..
Event Types
For maximum flexibility you can create individual email schedules for Motion detection triggers, Alarm triggers, Exception errors and Smart detection triggers. To edit a schedule first click one of the coloured radio buttons to the right of the schedule to select the event type you want to configure.
Editing A Schedule
By default each of the 4 event types are scheduled to be active 24 hours a day, 7 days a week.
Removing A Schedule
To remove a schedule follow these simple steps:
1.Click the coloured radio button for the event type you want to remove.
2.Click and drag over the time period you want to remove the scheduled notifications from. You can drag over multiple days at once if needed.
Creating A Schedule
To create a schedule or add to an existing schedule follow these simple steps:
1.Click the coloured radio button for the event type you want to create the schedule for.
2.Click and drag over the time period you want to schedule notifications for. You can drag over multiple days at once if needed.
Copying Email Schedules From One Camera To Another
Rather than re-creating the same schedule for each camera you can copy schedules from one camera to another by clicking the Copy button. For more information on copying schedules see the Parameter Copy section.
Defaulting Settings
You can restore settings back to their default value by clicking the Default button.
Saving Changes
Once you are happy with your schedules click the Apply button to save them. Alternatively you can right click with the mouse to exit the Record Schedule screen without saving changes.