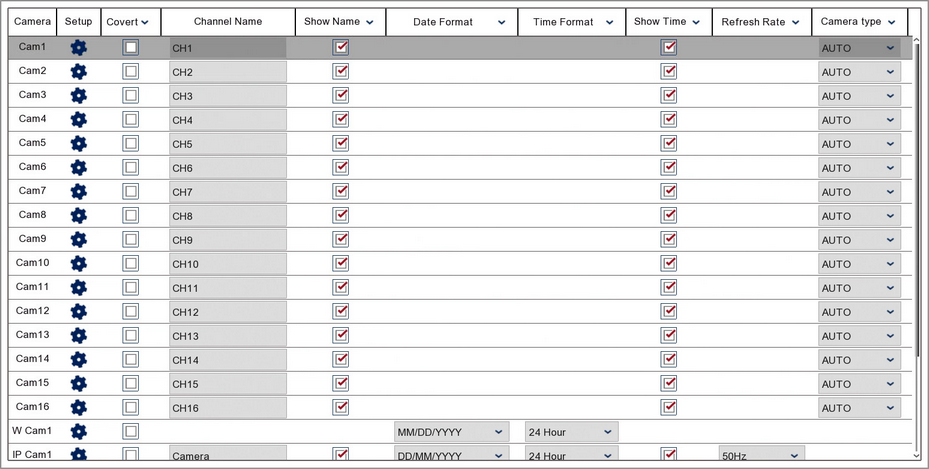
The Live sub-menu in the Video menu allows you to dictate how a camera's details and image are visually displayed during live view and on recorded files.
Settings available will differ depending on recorder, camera type and camera model.

Camera
Lists all channels on the recorder.
Setup
Clicking the cog icon takes you to the Setup screen for that camera. The Setup screen displays the camera's image as well as the same setting options from this screen plus images controls for Hue, Brightness, Contrast and Saturation. Having the camera's live images displayed allows you to see changes in real-time.
Covert
The Covert tick-box is an easy way to set a channel up for covert recording. When the Covert tick-box is checked the camera's footage is still recorded but it will not appear in live view displays.
Channel Name
You can give each channel a more relevant name such as "Gate" rather than the default CH1, IP CAM1 etc. Clicking inside the Channel Name field will display the virtual keyboard so you can enter a new channel name of up to 40 characters.
Show Name
When this tick-box is selected the channel name will be overlayed on the camera's image during live view and an on recorded footage. To hide the channel name just untick this option.
Date Format
You can change how the date is displayed in Date Format drop down list. There are 3 options to choose from, MM/DD/YYYY, YYYY-MM-DD or DD/MM/YYYY.
Time Format
You can choose if the time is displayed on the cameras image in 12 or 24 hour format using the Time Format drop down list.
Show Time
When this tick-box is selected the time will be overlayed on the camera's image during live view and an on recorded footage. To hide the time just untick this option.
Refresh Rate
You can set the camera's refresh rate as 50Hz or 60Hz using the drop down list.
Camera Type
For HD cameras you can choose the Camera Type for each camera from the drop down list. By default the camera type will be set to Auto which will automatically detect the camera type and configure the recorder accordingly. When set yo auto TVI, CVI, AHD and CVBS cameras are supported on that channel. You also have the option to specify TVI or AHD cameras only from the drop down list.
Copy Settings
You can copy settings from one camera to another as explained in Parameter Copy section. Just click the Copy button the display the Parameter Copy window.
Defaulting Settings
You can restore settings back to their default value by clicking the Default button.
Saving Changes
Once you have configured your cameras click Apply to save your new settings.